Wednesday, October 9, 2024

Brown Butter Pumpkin Cinnamon Chip Cookies

adapted from: broma bakery


 INGREDIENTS

1/2 cup browned butter
1/3 cup pumpkin puree, cooked down*
1 cup brown sugar (213g)
1 egg yolk
2 tsp vanilla extract
1 3/4 cup a.p. flour (220g)
1/4 teaspoon salt
1/4 teaspoon baking powder
1/2 teaspoon baking soda
1 1/2 teaspoons pumpkin pie spice
2/3 cup cinnamon chips


DIRECTIONS

In a large bowl mix together browned butter, pumpkin, and brown sugar until the brown sugar has dissolved.
Add egg yolk & vanilla, and mix until combined.
Add flour, baking soda, baking powder, and pumpkin pie spice. Stir until *just* combined. Light streaks of flour will probably still be chilling there.
Fold in cinnamon chips.
Scoop cookie dough with a #30 scoop (2.25 Tbsp). Place on a cookie sheet.
Refrigerate dough for at least 30 minutes.
Preheat oven to 350ºF.
Place on cookie sheet, 2 inches apart. Slightly flatten the dough.
Bake for 13 minutes.
Let cook on cookie sheet for 2 minutes before transfering to cooling rack.

*Take a 15 oz can of pumpkin puree, and over medium heat cook down to half the volume. The puree will become thick, and the color will deepen significantly.

Wednesday, August 4, 2021

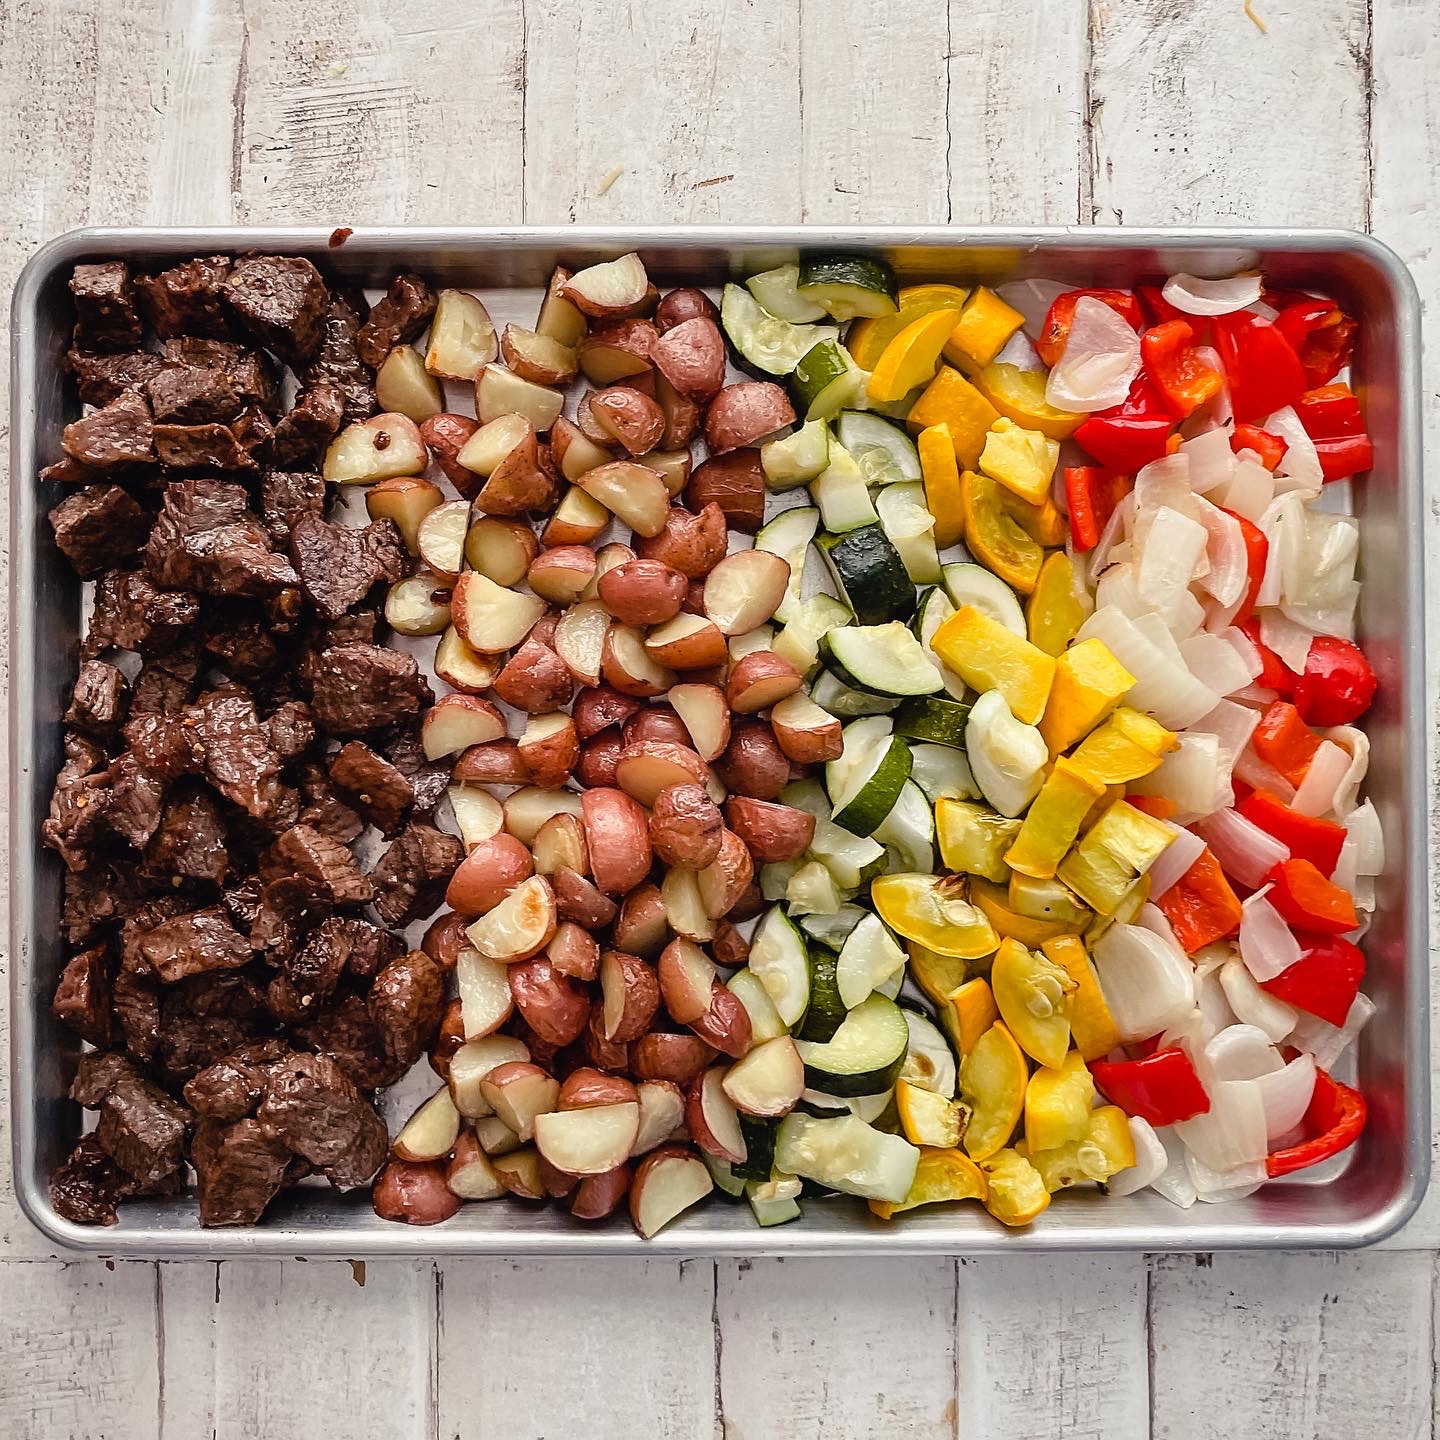
Bengal Bowls with Bacon Wrapped Asparagus

 INGREDIENTS

Coconut Rice
2 cups jasmine rice
4 cups coconut milk
pinch of kosher salt
Sweet & Spicy Beef
2 lbs Beef Sirloin, Cut into Chunks
1 cup Pineapple Juice
1 cup Soy Sauce
1/2 cup Brown Sugar
1/4 cup Trader Joe's Pineapple Spread
1 Tbsp Lime Juice
1 Tbsp Garlic, Minced
1 Tbsp Black Pepper
1 Tbsp Ginger
1/2 Tbsp Sesame Oil
2 tsp Crushed Red Pepper Flakes
1/2 tsp Ground Cayenne
1 Tbsp Corn Starch
Veggies
1.5 lbs Baby Red Potatoes, Cut into Fourths
1 large Zucchini, diced
1 large Yellow Squash, diced
1 large sweet onion, diced
2 bell peppers, diced
Safari Asparagus
1 lb Thick Cut Bacon
Asparagus to your heart's content

DIRECTIONS

Coconut Rice
Throw rice, coconut milk and salt into rice maker, and press start. Please, just buy the rice maker.

Safari Asparagus
Preheat oven to 400ºF, or set up your grill to high, or your Traeger to 350ºF. 
Prepare asparagus spears- I like to snap each individual spear, but you can line them up, snap one, and then cut the rest at the snap line. You do you. The Safari Skewers at Disneyland use thick asparagus spears, and skewer them. I do not have the patience to mess with skewers- I am scared I will skewer my hand again. So I bought thin asparagus, and wrapped a piece of bacon around a bunch of four to five.
I then laid the bacon wrapped asparagus, bacon ends down on a cooling wrap placed inside a baking sheet. Then popped it into the oven until the bacon was cooked to my preference, crispy-chewy, which took about 25 minutes because I kept checking on it.

Sweet & Spicy Beef
Omitting the corn starch, mix all the ingredients together, and pour about half over the steak to marinate for 1 hour. You can do this in a ziploc bag, a bowl, whatever makes your heart happy. Just make sure the steak is covered, and let it chill in the refrigerator. 

Veggies
Preheat oven to 400ºF. Prepare baking sheet with a glug of high heat oil, like vegetable or canola oil. Do not ruin your pans and sanity with olive oil. It will scorch and will not taste good.
Placed diced vegetables on the baking sheet. You do not want to overcrowd the veggies, so it may take two baking sheets. 
Toss the veggies in the glug of oil, and season liberally with kosher salt. For the love of all that is holy do not use table salt- it's gross. I am a huge fan of Diamond Crystal Kosher, but will use Morton Coarse Kosher, just don't do table salt.
Then roast in the oven, if you had to use two sheets, rotate between racks placed on the top third, and bottom third of the oven.
The veggies will be done when the potatoes are fork tender. At this time, crank up the oven to broil and let the veggies really brown under the broiler. My onions and peppers had cooked much faster than my squash and potatoes, so at this time I put the Sweet & Spicy Beef on the bottom rack while I broiled the squash & potatoes.

Sweet & Spicy Beef (continued)
Prepare baking sheet with a generous helping of cooking spray.
Remove steak from marinade and place prepared baking sheet. Bake until the steak is cooked to your preference. My family wanted a hair over medium rare, and it took about 10ish minutes.

With the marinade you set aside, and probably some from the steak. Pour into a sauce pot and bring to a boil over medium-high. Let boil for 4-5 minutes, it should get a little thick on its own. At this time, remove like 1/4 cup of the mixture and whisk together with the corn starch to make a slurry. Reduce heat and whisk the slurry into the sauce, and let the magic happen.

Assembly
(Coconut Rice + Veggies + Sweet & Spicy Beef) Drizzle Sauce Over Top = YUM
Top it with the Safari Asparagus. And enjoy!


**I realize not everyone has two ovens, and a seemingly unlimited supply of baking sheets. Cook the veggies on the stove, but do not overcrowd the pan. We are not steaming our food, we want to give our food color and flavor.

Wednesday, July 28, 2021

Pineapple-Coconut Chicken Bowls


INGREDIENTS
Coconut Rice
2 cups jasmine rice
4 cups coconut milk
pinch of salt
Pineapple-Coconut Sauce
4 Tbsp honey
4 Tbsp Trader Joe's Island Soyaki
2 Tbsp Trader Joe's Pineapple Spread
2 Tbsp Soy Sauce
2 Tbsp olive oil
1 tsp garlic powder
6 oz pineapple juice
1 cup shredded coconut
Pinch of salt
Chicken & Veggies
2 lbs chicken breasts, cubed
1 pineapple, cubed
1 large sweet onion, diced
3 bell peppers, diced


DIRECTIONS

Coconut Rice
Throw rice, coconut milk and salt into rice maker, and press start. Please, just buy the rice maker.

Pineapple-Coconut Sauce
Mix all the ingredients together. The amounts are a rough estimate, cooking is from the heart.

Chicken & Veggies
Pour half of the pineapple-coconut sauce onto the chicken, massage it in there. At this point, you can marinate it for up to an hour, or throw it on a sheet pan and bake in the oven at 400ºF for 30 minutes.

Pour the remaining half of the pineapple-coconut sauce onto the onions, peppers, and pineapple. Spread in an even layer across a baking sheet, and bake for 15 minutes, or until bell peppers just start to soften up.

Assembly
Rice + veggies + chicken = YUM.


This is my family's take on the recipe from a popular macro-counting recipe book. While we love love LOVE their version, this version is a lot easier to make and a little more packed with flavor. It's comforting, and bright and just a good way to eat flavors that aren't typical.

Thursday, August 20, 2020

Mackles'more

Mackles'more
Mackles'more
Adapted From Female Foodie

INGREDIENTS

2 3/4 cups all-purpose flour
1 teaspoon ground cinnamon
1 teaspoon kosher salt
1 teaspoon baking soda
3/4 cup unsalted butter
1 cup packed light brown sugar>
1/2 cup granulated sugar
2 large eggs
1 teaspoon vanilla extract
4 oz Theo Chocolate Pure 70% Dark Chocolate, cut into chunks (1.33 bars)
1 cup packed mini marshmallows
36 square-sized store-bought graham crackers
7.5 oz Theo Chocolate Pure 45% Milk Chocolate squares, halved (2.5 bars)

INSTRUCTIONS 

Line two baking sheets with parchment paper.
Whisk together the flour, cinnamon, salt and baking soda in a medium bowl; set aside. Cream the butter, brown sugar and granulated sugar in a stand mixer on medium-high speed until pale and fluffy, about 3 minutes. Add the eggs, one at a time, mixing on medium speed for 15 seconds after each addition. Add the vanilla and mix until smooth. Add the dry ingredients and mix until combined. Fold in the dark chocolate and the marshmallows.
Using a medium cookie scoop (about 1 1/2 tablespoons), scoop the dough into balls and place them close together on one of the prepared baking sheets. Freeze for at least 1 hour.
Preheat the oven to 400 degrees F.
Place the graham crackers side by side on the second prepared baking sheet. Place 1 ball of the frozen cookie dough on each graham cracker. Bake until the cookies are puffed and just turning golden, 10 to 12 minutes. Remove the baking sheet from the oven and immediately press 1 piece of milk chocolate onto each hot cookie--be sure to really press the chocolate into the soft cookie so that when it melts, it puddles on the cookie and doesn't run off.

Wednesday, August 12, 2020

Pupper Cake


INGREDIENTS
Cake
1 cup a.p. flour
1 tsp baking soda
1/4 cup coconut oil, melted
1/4 cup applesauce*
1/4 cup peanut butter*
1/4 cup honey
1/3 cup pumpkin
1 large egg
1 tsp vanilla extract
"Frosting"
1/2 cup plain greek yogurt*
1/4 cup peanut butter*
2 Tbsp honey

DIRECTIONS

Cake
Preheat oven to 350ºF.

Prepare two 4x2 inch cake tins with cooking spray, set aside. 

In a medium bowl, whisk together flour and baking soda, set aside.

In a second bowl, whisk together coconut oil, applesauce, peanut butter, honey, pumpkin, egg and vanilla until thoroughly combined.

Pour wet ingredients over flour mixture, and gently stir with a rubber spatula until incorporated.

Pour batter evenly between the two prepared cake tins, and level the top of the batter.

Bake cakes on a baking sheet for 25-30 minutes, or until a toothpick comes out with a few moist crumbs.

Remove from oven, and let cool in tins on cooling racks for 5 minutes before removing to finish cooling.

Icing
Whisk together greek yogurt, peanut butter, and honey until smooth. Keep cool in refrigerator until needed.

Assembly
When the cakes have completely cooled, level-off the tops with a serrated knife.

Place bottom layer cut side up, top with 1/3 cup frosting. Place top layer cut side down, and frost with remaining frosting.

Serve to your favorite pupper friends!

*Unsweetened is the ONLY way to go! Please do not give your canine friends ingredients with excess sugar, sugar substitutes like xylitol and other sugar alcohols. They are just not good ingredients to give to your doggos.

This is Puppa-Roni on her first birthday… she was in Pupper HEAVEN with this cake.

Friday, July 10, 2020

Citrus Crumb Bars

Lemon Crumb Bars
adapted from TastyKitchen

INGREDIENTS
Filling
2- 14 oz can sweetened condensed milk
1 cup lemon juice
Zest of lemon
0.5 tsp vanilla extract
0.5 tsp salt
Crumb
1.5 cups ap flour
1 cup oatmeal
1 cup brown sugar
2/3 cup melted butter
1 tsp baking powder
1 tsp salt

DIRECTIONS
Preheat the oven to 350ºF.
Combine milk, citrus juice and zest. Mix well and set aside.
Mix remaining ingredients until crumbly..
Press half of the dry mixture into a lightly greased 9x13 baking dish.
Pour the sweetened condensed milk mixture over top.
Finish by sprinkling remaining dry mixture over the top of the citrus filling, and gently press.
Bake for 25-30 minutes.
Cool completely then store in the refrigerator.

KEY LIME COCONUT CRUMB BARS
Key Lime Coconut Crumb Bars
INGREDIENTS
Filling
2- 14 oz can sweetened condensed milk
1 cup Key Lime juice
zest of Key Limes
0.5 tsp vanilla extract
0.5 tsp salt
Crumb
1.5 cups ap flour
0.5 cup oatmeal
1 cup flaked coconut
1 cup brown sugar
3/4 cup melted butter
1 tsp baking powder
1 tsp salt

DIRECTIONS
Same as above.


I first found this recipe a couple years ago, and instantly fell in love. I was going through a lemon phase, and this recipe filled my need for all things lemon. I doubled the sweetened condensed milk and juice from the original recipe because I needed it to have a little more zip. About a year later I went through a lime phase, and revamped this recipe to be my ultimate lime dream. I think this works best with citrus fruits that are zippy! Oranges might be too sweet to for this application. I'm not sure about grapefruit, because I'm allergic- but someone should try it and let me know! This recipe is fool proof, and easy!

Monday, June 8, 2020

Chrissy's Banana Bundt Bread

Recipe Source: Chrissy Teigen's Twitter
INGREDIENTS
2 cups mashed BROWN bananas (about 6)
4 eggs
2/3 cup canola oil
2 cups all-purpose flour
2 cups sugar
1 3.5 oz box vanilla instant pudding
1 tsp baking soda
1 tsp kosher salt
1 cup unsweetened shredded coconut
2.5 dark chocolate, chopped (optional)

DIRECTIONS

Preheat oven to 350ºF.

In a medium bowl, whisk together flour, sugar, pudding mix, baking soda, and salt.

In a large bowl, combine mashed bananas, eggs, and oil. 

Add dry ingredients into banana mixture, and combine. Gently fold in coconut. 

Pour batter into a greased and floured Bundt pan, and bake for 1 hour.

Test with a skewer or toothpick around minute 50.

Remove from oven, and let cool slightly. Use a butter knife to gently release from pan- don't forget inner circle, before flipping onto another plate.

Serve warmed up slices with a chunk of sweet-salty butter.

This is one of three ways that bananas should ever be consumed. The other two are: covered in ice cream & syrup, and Bluth's Original Frozen Banana- because there is ALWAYS money in the banana stand. All jokes aside, this is much like the banana bread that we all grew up with but better.
You look at it, and think, "that banana bread is pretentious AF." and then you taste it and realize that it is just a better version of your OG. The addition of vanilla instant pudding ups the moist factor, the shredded coconut brings a nice contrast that isn't nuts (imo- nuts are aways welcome to the party) and if you want to go hugely decadent, the chopped dark chocolate will do just that. Make this.

I did have to adjust Chrissy's recipe by baking this at 350ºF for the suggested time. I live at a high altitude, and the banana bread ended up heavy and gummy when baked at the suggested 325ºF, even after added an additional 20 minutes to the cook time.

Monday, May 18, 2020

Hawaiian Haystacks

INGREDIENTS
Coconut Rice
2 cans reduced fat coconut milk
2 cans* jasmine rice
*use the coconut milk cans to measure rice

Chicken Gravy
1 can coconut milk, divided
1 cup sour cream
2 cups shredded chicken**
2 Tbsp butter
1 Tbsp minced garlic
2 Tbsp flour
1 tsp salt
1 tsp fresh black pepper
1 tsp onion powder
1/2 cup whole milk

Toppings
Pineapple tidbits
Sliced black olives
Crunchy chow mein noodles
Shredded coconut
Slivered almonds
Shredded cheese
Shredded carrots
Mandarin orange segments
Frozen green pees, thawed
Diced bell peppers, green, red
Diced tomatoes
Diced green onions
Diced celery
**Make this as easy or involved as you like. Rotisserie chicken is delicious, and so is frozen chicken made in the instant pot and shredded. I guess you could even go the canned chicken route.

DIRECTIONS

In your rice maker, combine jasmine rice and coconut milk, and cook according to package directions. The rice will be moist, and has the potential to burn on the bottom.

In a medium bowl, combine 1/2 can coconut milk and sour cream. Whisk until combined and then set aside.

In a large sauce pan over medium heat, melt butter.

Add the garlic, continually moving garlic around until lightly browned. Add flour, and whisk in the pan for 1-2 minutes. The longer you cook this portion, the more flavor you will impart on your gravy.

Add salt, black pepper, and onion powder, milk, and half of the coconut milk.

Whisk until combined, and bring to a simmer.

Cook until gravy starts to thicken up, about 2-3 minutes.

Whisk in remaining coconut milk, and the sour cream.

Add chicken, and stir until the gravy has warmed through.

Place all of your toppings in individual bowls, or in rows on a sheet pan for people to pick their own toppings.

To Serve:

Bed of coconut rice, top with chicken gravy and pile toppings as high as your tummy will let you.

Sunday, April 12, 2020

Classic Sandwich Bread by Lo's Kitchen

Recipe Source: Lo's Kitchen: Classic White Sandwich Bread
INGREDIENTS
2 1/2 cups water, 115º F
1 1/2 Tbsp Instant Yeast
1/3 cup Raw Honey*
1/4 cup Unsalted Butter, Softened
2 tsp Sea Salt
7 cups Bread Flour** + more as needed
OR
7 cups AP Flour
2 Tbsp Vital Wheat Gluten

DIRECTIONS
In stand mixer, mix water, yeast, honey, and 3 cups of flour***. Mix until combined. Cover with a clean tea towel, and let sit for 20 minutes. The mixture should almost double in size, and when stirred with have a "sponge-like" structure inside.

Add 2 more cups of flour, salt, and butter to your sponge mixture; and set your mixer to a low speed. Slowly incorporate the remaining flour in 1/2 cup increments.

When the dough seems soft, not too sticky, and is gently pulling away from the sides of the bowl, you have added enough flour. Knead for 10 minutes.

After kneading, round out the dough into a ball. Grease the bottom of a bowl, place dow in bowl, and cover. Let rise about 25-30 minutes, or until doubled in size.

Grease two 9x5 inch pans.

Punch down the risen dough to release air bubbles. Divide the dough in half. On a lightly flour surface, gently work dough into a tick rectangle (about 12x8") and fold into thirds- letter fold. Roll it up, and pinch the seams together, and gently thrown loaf on the work surface. Pinch seams down one more time, and gently roll against work surface to elongate the loaf. Repeat with other half of dough.

Place loaves in prepared pans, cover, and let rise for about 25 minutes, or until the peak of the loaf is just arching over the rim of the pan.

While dough rises, preheat oven to 375ºF.

Bake for 25 minute, or until bottoms are golden brown.

Remove from pans, and transfer to cooling rack. Generously lather the tops of loaves with butter.

Let cool completely before slicing.

*130 grams Yack's Unfiltered Honey
**1000 grams Lehi Mills Unbleached Turkey Flour.
    400g at sponge stage, remainder at second stage
**If using APF+VWG, add the vital wheat gluten at this stage.

Tuesday, January 14, 2020

Fruity Pebble Marshmallow Cookies


Recipe Adapted from: Momofuku Milk Bar: A Cookbook by Christina Tosi

INGREDIENTS
225 g unsalted butter, room temperature
200 g granulated sugar
150 g light brown sugar, packed
2 g vanilla extract
1 large egg
360 g all-purpose flour
2 g baking powder
1.5 g baking soda
5 g kosher salt
3 cups Fruity Pebble Crunch
65 g miniature marshmallows

DIRECTIONS 

In a medium-sized bowl, combine whisk together flour, baking powder, baking soda, and salt.

Combine the butter and sugar in the bowl of a stand mixer fitted with the paddle attachment and cream together on medium-high for 2 to 3 minutes. Scrape down the sides of the bowl, add the egg and vanilla, and beat for 7 to 8 minutes until pale yellow in color.

Reduce the speed to low and add the dry ingredients. Mix just until the dough comes together, no longer than 1 minute. (Do not walk away from the machine during this step, or you will risk over-mixing the dough.) Scrape down the sides of the bowl with a spatula.

Using a #40 cookie scoop (roughly 2 Tablespoons), portion out the dough onto a parchment-lined sheet pan. Pat the tops of the cookie dough domes flat. Wrap the sheet pan tightly in plastic wrap and refrigerate for at least 1 hour, or up to 1 week. Do not bake your cookies from room temperature— they will not bake properly.

Heat the oven to 350°F.

Arrange the chilled dough a minimum of 4 inches apart on parchment- or silpat-lined sheet pans. Bake for 12-15 minutes (depending on your oven). The cookies will puff, crackle, and spread. After 18 minutes, they should be very faintly browned on the edges yet still bright yellow in the center. Give them an extra minute or so if that’s not the case.

Cool the cookies completely on the sheet pans before transferring them to a plate or an airtight container for storage. At room temp, cookies will keep fresh for 5 days; in the freezer, they will keep for 1 month.

Tuesday, December 17, 2019

White Chocolate Peppermint Pretzel Cookies

INGREDIENTS
1 cup unsalted butter, softened at room temperature
3/4 cup granulated sugar
3/4 cup light brown sugar, packed
1 tablespoon vanilla extract
2 large eggs cold
2 3/4 cups all-purpose flour
1 tsp baking soda
1 tsp kosher salt
2 cups Ghirardelli Peppermint Chunks
1 cup miniature pretzels, crushed
Crushed Peppermint Candies
Miniature Pretzels
Flaky Finishing Salt

DIRECTIONS
Using a paddle attachment, further soften butter until lighter in texture.
Cream together granulated and brown sugar, until pale in color. Scraping down the sides of the bowl.
Add vanilla extract, and mix to incorporate.
Add eggs one at a time, beating on medium speed until the mixture is smooth. Scrape bowl between additions.
In a medium bowl, whisk together flour, baking soda, and salt. To ensure even distribution of baking soda and salt.
Add half of the flour mixture to the bowl, and pulse until barely incorporated.
Again, scrape the sides of the bowl, and be sure to lift the ingredients from the bottom.
Add remaining flour, and pulse until just mixed. There will probably be some flour still visible.
Again, scrape the sides of the bowl, and be sure to lift the ingredients from the bottom.
Add peppermint chunks, and crushed pretzels, and mix until incorporated.
It's okay if the paddle crushes the pretzels and chunks, the broken pieces are more evenly distributed.
Using a cookie scoop, (I used a #40 scoop, which is about 1.75 Tbsp), scoop your dough.
Place balls of dough on a cookie sheet, and scoop the entire batch.
Roll the top half of the dough in the crushed peppermint candies, and top with a miniature pretzel.
Refrigerate dough for at least half an hour, up to a day. Then bake.
Preheat oven to 375° F; at least 30 minutes before you begin to bake.
Place dough on cookie sheet, at least 2 inches apart.
Bake cookies for 10-12 minutes, until edges are lightly golden brown.
Top cookies with flaky finishing salt.

This is legitimately my new favorite cookie. I first discovered the flavor combination when I mistakenly thought my niece's favorite thing was white chocolate and peppermint- (she likes it when it's on top of very thick dark chocolate)… so I grabbed a bag of these at Costco, and then quickly became obsessed with them. My favorite flavor of Perk Energy is even inspired by those White Chocolate Peppermint Pretzel Crisps. So when I was making chocolate chip cookies as a request from my grandma, I figured why the heck not? I grabbed a bag of Ghirardelli Peppermint Chunks from the freezer, crushed some pretzel until I had a cup, decided they didn't look quite festive enough, and bam! my new favorite holiday cookie was born. I took them to work the next day to test on some of our clients, and by the double fisting action that went on, I knew they were winners.

Wednesday, December 11, 2019

Creamy Stove Top Mac-n-Cheese

adapted from Alton Brown's Stove Top Mac-n-Cheese

INGREDIENTS
3 cups elbow macaroni
1/2 stick butter, unsalted
2 large eggs
8 ounces evaporated milk
2 tsp sriracha
1 tsp mustard
1 tsp kosher salt
1 tsp fresh black pepper
8 ounces Monterey Jack Cheese
8 ounces Medium Cheddar Cheese

DIRECTIONS

Whisk together eggs, milk, hot sauce, salt, pepper, and mustard.

In a large pot, cook the pasta to al dente and drain. Return to the pot, and over low heat melt in the butter, toss to coat.

Stir egg/milk mixture into the pasta, and add the cheese.

Over low heat, continue to stir for 3-5 minutes, or until creamy.

Enjoy!

You know when the craving for a pot of creamy macaroni and cheese hits, and you're out of the boxed stuff, but you're also going to die before you can whip some homemade goodness up AND pull it out of the oven? Well, that was last Sunday at our home. Everyone was hankering for some hot mac'n'cheese, and none of us wanted to deal with the hassle of a baked mac'n'cheese, but we also didn't have any of the boxed stuff and by the time we got back from the store, even that would have been too long of a wait. So while at the store, I told my sister to throw 3 cups of macaroni in some boiling water, and we would figure it out when we got home. My niece grabbed 8 ounces of cheddar, and 8 ounces of monterey jack when she ran into the store, and we made adjustments based on what we had. I added more evaporated milk, used all the cheese that she bought, the only hot sauce we had was sriracha, and it got doubled because I didn't know how to open it. My niece who hates mac'n'cheese freaking loved this, and it was so easy that it will for sure be how we get our mac'n'cheese on from now on.

I think you could use just about any combination of cheese your heart desires.
This recipe could easily be gluten free if you used a GF pasta.

Monday, November 25, 2019

Cake Blog Favorites

A stacked cake is intimidating to me. However, since discovering Courtney Rich of Cake by Courtney, my confidence in the kitchen when it comes to cake has grown exponentially. Courtney has broken down cake baking and decorating in a way that makes cake fun, accessible, and a way to build your confidence.

If for whatever reason you aren't already obsessed with her, you need to check out her website: cakebycourtney.com right now! I have yet to make a cake from her that I or a friend/family member did not love.

These are my favorites:


RED, WHITE AND BLUE BERRY CAKE


Sunday, June 23, 2019

S'mores Cookies


recipe adapted from Two Peas and Their Pod

INGREDIENTS
1 cup graham cracker crumbs
1 1/4 cups all-purpose flour
1/2 teaspoon baking soda
1/2 teaspoon salt
1/2 cup unsalted butter, room temperature
1/2 cup brown sugar
1/3 cup granulated sugar
1 large egg
1 tsp vanilla extract
1 cup Hershey's Milk Chocolate, chopped
1/2 cup mallow bits
Optional:
Hershey's Milk Chocolate Candy Bars
Mallow Bits
Extra graham cracker pieces

DIRECTIONS
Preheat the oven to 350 degrees F.

Line a half sheet pan with parchment paper, and set aside.

In a large bowl, whisk together graham cracker crumbs, flour, baking soda, and salt. Set aside.

In the bowl of a stand mixer, beat the butter and sugars together until creamy and smooth. Scrape down the sids, and then add the egg, and vanilla extract, and beat until smooth.

Carefully add half of the dry ingredients, and mix until a dough starts to form. Add the remaining dry ingredients and mix until just combined - there should be crumbs on the bottom.

Gently fold in the mallow bits, and chopped chocolate bars. Taking care to lift all of the dry crumbs from the bottom of the bowl.

Scoop dough with your favorite cookie scoop, and plate rounded ball on prepared baking sheet. Flatten top of dough with the palm of your hand. Repeat, placing cookies about 1 inch apart.

Top dough with a pips of Hershey's Milk Chocolate, and mallow bits.

Bake for 6-8 minutes, or until cookies are set. Remove from oven, and cool on baking sheet for at least 2 minutes before transferring to a cooling rack.

*I used a #40 Scoop, which is about 1.75 Tbsp of dough. Which gives the perfect S'mores ratio of chocolate:graham:mallow, with the addition of a pip of Hershey's Milk Chocolate.

S'mores Cookie
Ain't nobody got time to build a fire, put out a fire, clean up the sticky mess, AND wash your hair- all in the name of eating America's favorite campfire treat, the S'more. These cookies incorporate all the best things about S'mores without all the hassle of S'mores. Truly a gift. The dough is fairly dry, so the cookie ends up crunchy like a graham cracker, and when eaten lone tastes like a graham cracker. The mallow bits are dehydrated mallows - like the ones from hot chocolate packets. So on the inside they absorb some the moisture from the dough and get soft & chewy; but the ones on the outside get a tiny bit browned, and are similar in texture and color to roasted mallows, just on a much smaller scale. The chopped Hershey's Milk Chocolate Bars, and the pip get melty and gooey. Just like the mallows of your dreams, but with so much less mess. These are winners.

Thursday, June 20, 2019

Lemon Ricotta Cookies

adapted from Giada De Laurentiis

INGREDIENTS
Cookies
2 3/4 cups all-purpose flour
1 tsp baking powder
1 tsp kosher salt
1/2 cup unsalted butter, room temp
2 cups sugar
1 lemon, zested
2 large eggs
1 (15-ounce) container whole milk ricotta cheese
1/4 cup lemon juice
Glaze
1 1/2 cups powdered sugar
3 Tbsp lemon juice
1 lemon, zested

DIRECTIONS

Preheat oven to 375º F.

Prepare baking sheets with parchment paper, and set aside.

In a medium bowl combine the flour, baking powder, and salt. Set aside.

In a large bowl or stand mixer, cream the butter, sugar, and lemon zest until pale yellow and fluffy.
Add eggs, one at a time. Add the ricotta, and lemon juice and beat until fully combined.

To the butter/ricotta mixture, add half of the prepared dry ingredients, and mix on low. Scrap sides of bowl and add remaining half of dry ingredients, mix until just combined. Gently fold the dough taking care to scrape the sides of the bowl, to finish the mixing the dough.

Scoop dough onto prepared baking sheets. *I prefer a #20 scoop (3.5 tbsp), and can fit about 24 cookies on a half sheet pan. Prepared cookies sheets, and dough should be kept in the refrigerator if not in the oven.

Bake for 15 minutes, until slightly golden at the edges. Remove sheets from oven, and let cookies cool on the baking sheet for at least 15 minutes. The cookies are extra delicate when warm, and the residual heat of the sheet helps to firm up the bottoms. When cookies have cooled, prepare glaze.

Combine powdered sugar, lemon zest, and lemon juice in a small bowl. Stir until smooth. Dip cookies, and let glaze harden at room temperature. Enjoy!

Are these cookies a family favorite that will be gone in less than 45 minutes? Yes. My family loves them more than they love me. At least that's the vibe I get from my mother and sister. My sister has requested that if she ever marries that I make her wedding cake out of these cookies- stacked to be the cake. They are the perfect delicate little cookie. Sweet but tart, tender, moist, and just plain delicious. You should definitely make them, especially when lemons are in season. I added more flour than the original recipe calls for, and highly suggest taking care to be sure it's fully mixed. If not, the cookies will spread like the devil, and it will be a crunchy lemon sugar butter mess. Extra delicious? Yes. Beautiful cookie? heck no.

VARIATIONS:

Lemon Ricotta Cookies with Berry Glaze
            Replace 2 Tbsp lemon juice with fresh berry juice of your choice.
            Strawberry & Raspberry SO good.
Orange Ricotta Cookies with Chocolate Glaze
            Replace Lemons with Oranges
            Double the zest in the cookies
            Chocolate Glaze
                        1 cup powdered sugar                            1 Tbsp butter, melted                        Orange Zest
                        2 Tbsp unsweetened cocoa powder    1 Tbsp Orange Juice


Saturday, June 15, 2019

Crumble Topping

Recipe from Rachel Parcell
 
INGREDIENTS
1/2 cup butter, room temperature
1 cup all-purpose flour
1 cup granulated sugar

DIRECTIONS
In a large mixing bowl, whisk together the sugar and flour.
Add the butter, and mix* until a crumble-y texture forms.

*You can do this with a pastry cutter, spoons, or freshly washed hands. Personally, I think it's best with a pastry cutter, because you lose less butter to your skin.

Top your favorite prepared muffin batter mix, and bake according to package directions. Let cool in muffin tip for at least 3 minutes before removing to allow to cool in a cooling rack. ENJOY!


This Crumble Topping recipe is as basic as you can get, and it is freaking delicious as is.
BASIC IS GOOD! 
You can always change it up, as you keep the basic ratio pretty similar. The more sugar/butter the crunchier the crumble, and more of a caramelized goodness will develop. The more flour you add the more sandy the crumble will be- which is good for topping juicier stuff. Swap the sugar for different blends depending on what you're going for - brown sugar, raw sugar, honey, whatever floats your boat. Adding vanilla paste is money, as is adding your favorite extract like almond, or even some citrus zest. Mix in some rolled oats, sliced almonds, or finely chopped nuts- that will give the crumble an insane crunch!
THE LIMIT DOES NOT EXIST…
WHEN IT COMES TO YOUR OPTIONS.

USES:
  • On top of fruit, and baked for a delicious fruit crumble. Any fruits will do, get creative! Just cook them a little, sweeten them up a touch if they are particularly tart, and bake.
    • MY FAVORITE: Grab a bag of frozen mixed berries, throw them in a pot with 1/2 cup sugar, your favorite extract, a squeeze of lemon juice, and lemon zest. Cook for a couple minutes over medium-high heat, to get the berries poppin' and to get the natural pectins in the berries. Transfer to casserole dish, top with crumble and bake at 350ºF for 20-30 minutes, or until golden brown.
  • Use it as the topping for fruit pies.
  • Since there is no limit on variations, there is no limit on what you can do with it. :)

Wednesday, May 15, 2019

Homemade Crunchy Taco Skillet

adapted from Iowa Girl Eats

INGREDIENTS
1lb lean ground beef
1 1/2 cups diced onion, frozen
1 good sized jalepeño*
1 taco seasoning packet
1 cup salsa
1 32 oz box chicken stock**
1 cup long grain white rice
1 can black beans, drained & rinsed
1 1/2 cups sweet corn, frozen
1 cup shredded cheese
Corn tortilla chips to crunch on top

DIRECTIONS
Brown ground beef with onion and jalapeño in a large skillet over medium-high heat. If using a fattier burger, drain then return to skillet.
Add taco seasoning, salsa, chicken broth, and rice and stir to combine.
Bring mixture to a boil, cover with lid and reduce heat to low.
Simmer for 15-20 minutes or until rice is tender.
Stir in corn and black beans until warmed through, remove from heat and stir in cheese until melted.
Place lid back on the skillet then let sit for 5 minutes before serving with toppings.

Okay friends. I first made this recipe for my family FIVE YEARS AGO. And it has become a family favorite, and has made at least two appearances on the table every month since. We've made even more modifications to the original recipe that I posted, and to be honest, the original doesn't even compare. We've upped the convenience by using frozen diced onions and frozen sweet corn. The frozen sweet corn is necessary because it completely changes the meal. We also just increased the salsa to a full cup because no one wants to wash a second measuring cup.

Seriously y'all. This recipe is the real deal. It's even requested as special birthday meals, because the kids have grown up loving this! We're love it as is, but you can definitely top it with whatever your heart fancies. Make this! Your family will not be disappointed.

*For a milder crunchy taco helper, remove rib and seeds from inside of the jalapeño.
**You can totally sub half of this for water, but if I am opening a box of chicken stock, I'm just going to throw the entire thing in. I will forget the other half of the box and it will go to waste. That's just the type of person I am.

Tuesday, March 26, 2019

Belgian Waffles

adapted from Simple Daily Recipes

INGREDIENTS
2 eggs, room temp
1 cup milk
4 Tbsp oil
2 tsp butter vanilla baking emulsion
1 cup cake flour
3 tsp baking powder
1/4 tsp kosher salt
1 Tbsp sugar

DIRECTIONS

Separate the yolk from the whites of your room temperature eggs.

Combine yolks with milk, oil, and vanilla emulsion. Beat until combined. Set aside.

In a clean metal or glass bowl, whip egg whites until stiff peak stage. A KitchenAid is your best friend for this. Reserve one quarter cup of stiff egg whites.

Turn on waffle maker to let it come to temperature.

In a medium sized bowl, thoroughly combine flour, baking powder, kosher salt, and sugar. Whisk in your wet ingredients, until mixture is homogenous. Slacken batter with 1/4 of egg whites, then carefully fold in the rest.

Fill waffle iron according to the directions, and bake in iron until it has reached the desired color. No one likes to clean up the mess of an overfilled waffle iron.

When you have approximately 1/4 of your batter remaining, gently fold in the remaining quarter cup of stiff egg whites. The last bit of batter is never quite as fluffy as the begging of the batch, and this has prevented me from having the dreaded waffle iron mess.

Serve with your favorite waffle toppings, and enjoy!

Ever have those moments when you see something that would make all of your childhood dreams come true, but you recognize that you're an adult and don't actually need that dream to come true? Well that was me with this Mickey Mouse Waffle Maker… and I resisted, until they came back in stock and my favorite Disney Instagrammer was like, "they're baaaaack!" Well friends, I don't regret the decision because this waffle iron has several settings, and a super even heating element. It's just pure quality… especially with this waffle recipe.
I didn't take very long searching for the perfect recipe. And then I was committed to making waffles, even though we didn't have regular flour OR vanilla extract, but the adjustments to the recipe are now necessary. Cake flour is a little sweeter, and much lighter, and Butter Vanilla Baking Emulsion is HEAVEN SENT. The trick of setting aside some of the stiff egg whites has also been loads of help, because the batter tends to be denser, and will just ooze out like lava if you don't have set it aside to add later.